
1 Dollar Cooler For Raspberry Pi 4 | HeatSink vs FanSink
In this article we will discuss how to make a 1 Dollar fansink for the Raspberry Pi to keep it cool. We will also show other available cooling options and compare them to our simple fansink. This should help you in making the right choice of heatsink to run your Raspberry Pi full time 24x7.
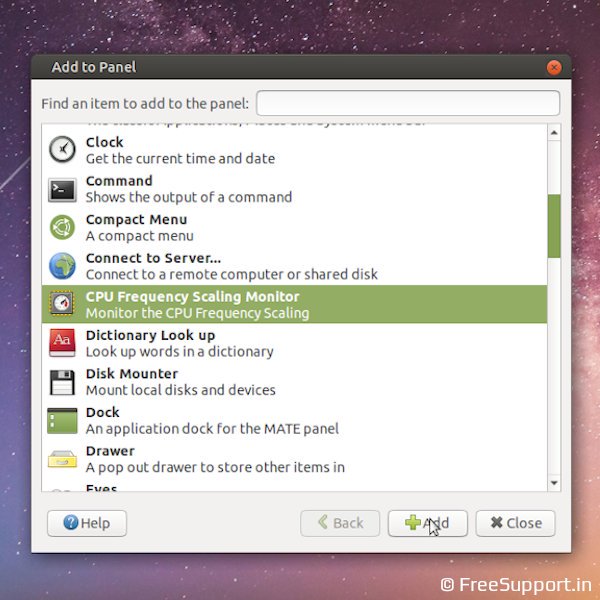
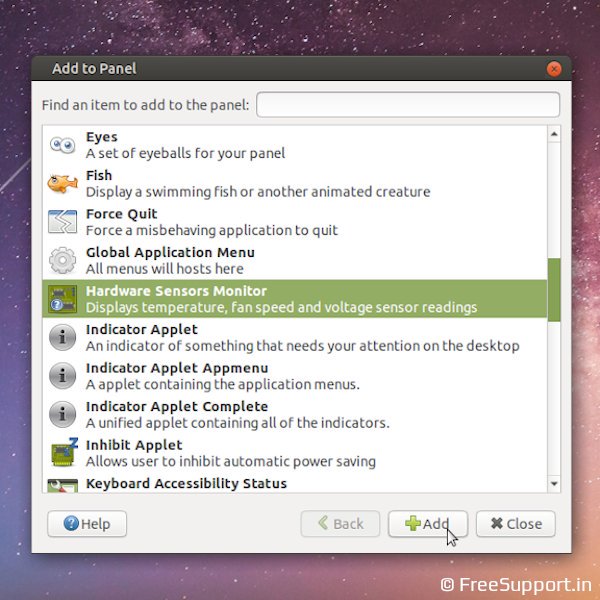
This is the CPU of our Raspberry Pi, it currently has a tiny copper heatsink over it which is not doing a great job in keeping it cool. In order to check the reason, we will use a few monitoring tools. Our Operating System is Ubuntu Mate, we will add CPU Frequency Scaling Monitor which will tell us the frequency that our processor is operating at, Hardware sensors monitor to see the processor temperature live and System monitor to check processor usage as a graph.
In order to stress the processor to 100 percent, we can use a program called Stress. But a simpler way is to run youtube at higher than playable resolution and it should occupy the processor to its maximum. We can choose any browser for the task, but in this case we are using chromium. Opening up Youtube in the browser should increase processor activity which we can see at the top of the screen, also we see that the temperature is climbing rapidly. As we can see in the processor graph, it is only operating at 50% of its capacity.

Idle temperature without heatsink

Processor @ 50% load
Let us increase the Youtube video resolution to 1440p, quite instantly we see that the processor is 100 percent occupied. Also, the temperature quickly reaches 80 degrees and the processor starts throttling, meaning it is lowering down the frequency to save it from damage. Although it will continue to work, the problem is that we now have a computer that works slower than intended. So, it is better that we use some sort of cooling solution for our Raspberry Pi to make it work at full capacity. Just to note, all this is happening at the base frequency of 1.5 Gigahertz as it is not even overclocked yet.

Temperature at full load

CPU throttling indicator
We will shut the pi off and try the thermal control solutions, but we will do it step-by-step to gauge how well each of them work. We will fix a heatsink to our Raspberry Pi's processor, as we can see, the heat sink already comes with a thermal pad along with the adhesive. All that we need to do is to peel off the protective layer and stick it right in the center of the processor. There are quite a number of heatsinks that are available in the market, a few of them are tall and will not fit in the standard case of the Pi, others are bulky and cover the entire Pi, but also block its Wifi Range. Then there are the extreme solutions that are outrageously expensive costing as much as the Raspberry Pi itself.

Aluminium heatsink

Expensive passive heatsink
We booted up the Pi with the new heatsink and we observed that the no-load temperature is quite less than before. Let's start the load test by opening youtube again. As we can see, the temperature sure is increasing but, the rate at which it is climbing is slower than before. Looks like the heatsink will absorb the heat because of its bulk, but eventually will get to the 80 degrees unless the heat is dissipated using air circulation. Mind you, we still haven't overclocked it. Lets add the next upgrade to the cooling system.
We will fix this tiny fan to the top of the Pi's Case Cover, remember why we chose a smaller heatsink earlier? It is to have the necessary space to fit this fan inside the case. The fan works on 5 volts and we can power it from the general purpose input output pins also called GPIO pins on the Raspberry Pi. As we can see here, these pins have 5 volt and ground which is suitable for the purpose. We will plug the red wire into the 5 volt pin and the black wire into the ground pin. Let us test it now.
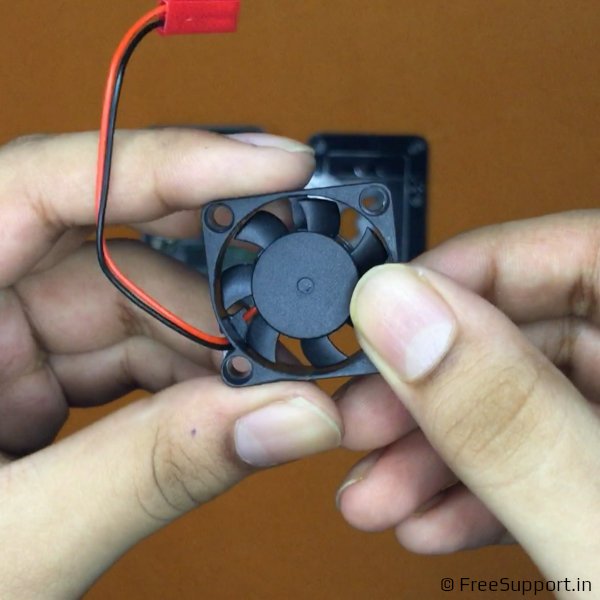
5v cooling fan

5v GPIO pins
Quite instantly, we see that our Pi's idle temperature is much lower than before. When subjected to load, we observed that the temperature does not increase as much, but, it is still not able to play the 1440p video comfortably. Since we now have a cooling system that will make sure our Pi will not get to 80 degrees even under full load, lets overclock the Pi to make it run quicker. Overclocking Raspberry Pi four is worth it because we can extract 25 percent more performance without any harm to the unit, it is also very simple to do. Just including these 4 lines in the right file and rebooting it will do the job. Here, we overclocked our Pi to 2 Gigahertz.

Idle temperature with heatsink

Youtube @ 1440p resolution

Overclocking Raspberry Pi 4 to 2GHz
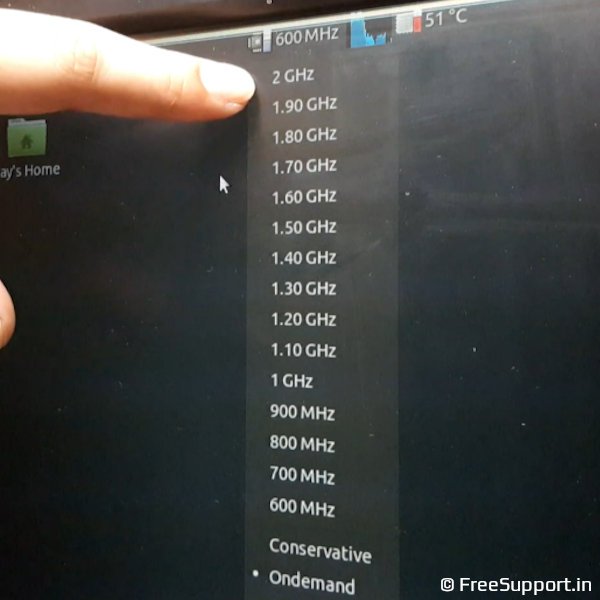
The 2GHz option
After the reboot, we see that the settings are applied and we now have the 2 Gigahertz option in our Frequency scaling monitor. We will start off the test by setting it to maximum frequency. Our video is playing smoother than before. Running the test over an extended period of time has increased the temperature to 72 degrees where it stabilized. This looks like a good cooling solution for our Pi since it will not get to 80 degrees and throttle. There is one problem though, these tiny fans run well for short periods of time, but fail quickly. Either they collect dust and slow down considerably or they start rattling and become noisy. Running them 24 cross 7, we found out that they last a couple of months maximum, which is why we need a better solution.
Here, we will use an inexpensive 80mm DC fan that we bought for 1 Dollar. It is similar to the ones that we use in our desktops. Since the fan works with 12 volts only and because the GPIO pins cannot output 12 volts, we will use an external 12 volt adapter to power the fan. We connected the red wire of the fan to the positive and the black wire to the negative of the adapter. We will tape these wires later, so as to not short them. Now we fixed 3 inch screws using the bolts to the mounting holes on the fan and tightened them using a screwdriver. This way we are created a simple stand off using which we can place this fansink over the Raspberry Pi.
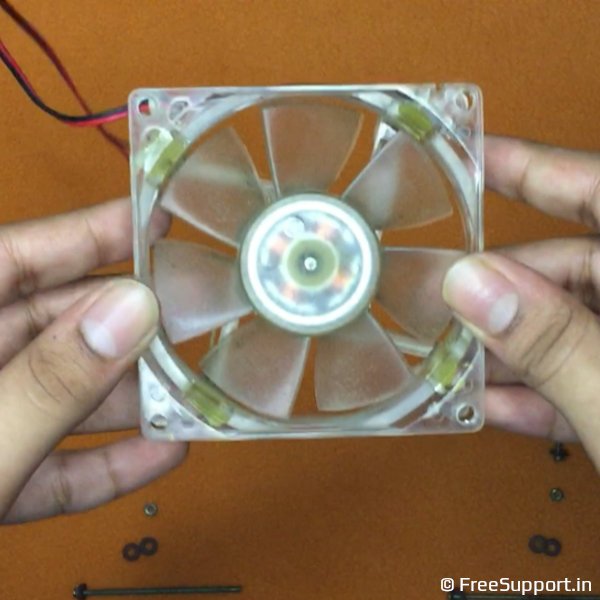
12v DC 80mm fan

AC to 12v DC adapter
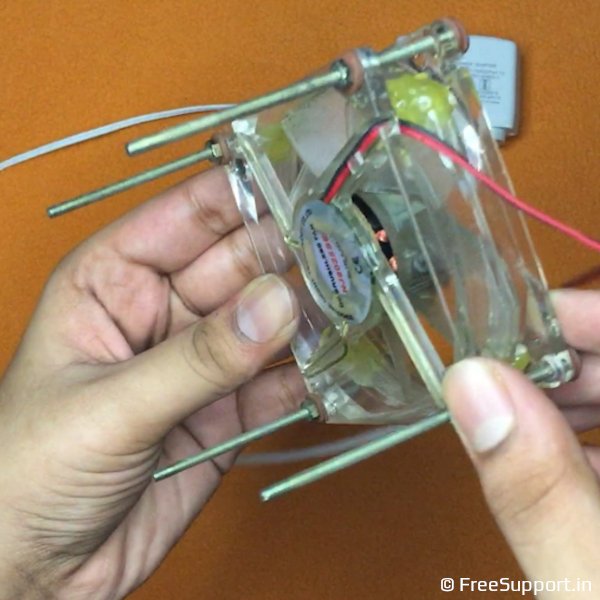
Fixing the standoffs
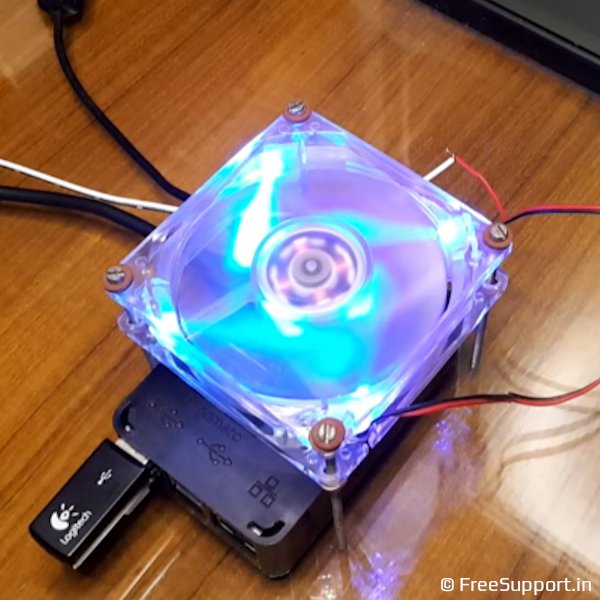
FanSink for 1 Dollar
WOW! It looks awesome, let's see how well it works. The idle temperature is low as expected, and at load, we observed a maximum temperature of 67 degrees, 5 degrees less than the smaller fan could manage. What's better is that, since the diameter of the fan is bigger, we are cooling not just the processor of the Raspberry Pi, but also the other components on the board. By placing it a couple of inches high above the board, the wind noise is much less than compared to earlier. This is the ideal cooler for a raspberry pi and we have been using it 24 cross 7 for well over a year. It is not ultra portable though, so, you can use the smaller fan when you need portability, but, for running it full time at your desk, you can use the bigger fan. If you do not like the fan's LED lights, you can use a fan without them and it will work just as well, what more? it will cost you 1 Dollar in all.

Max temperature at full load
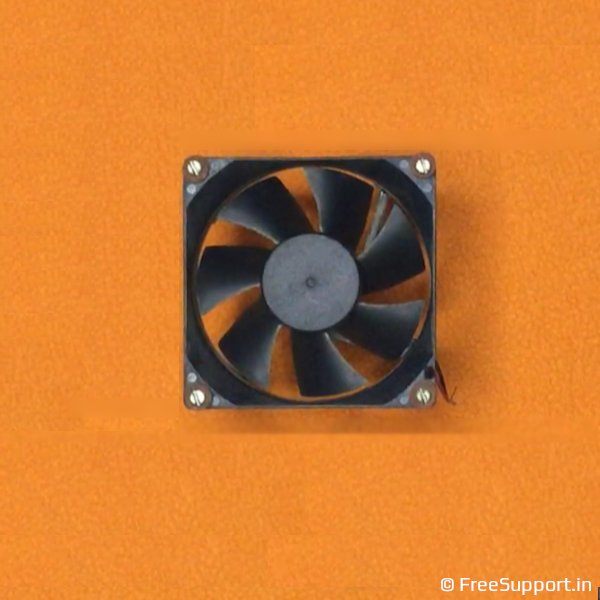
FanSink without lights
Authors | Arjun Vishnu

We made FreeSupport.in to provide free tech support. You can ask us questions on WhatsApp or Twitter.
I am Vishnu, I like Linux, single-board computers, and cloud computing. I create the web/video content, and I also write for popular websites.
My younger brother Arjun handles image and video editing. We also run a YouTube Channel that's focused on technology.
Comments powered by CComment